Portfolio Pages

Showing posts with label Mixed-Media. Show all posts

Tuesday, September 17, 2013

Plaiting Paper instead of Hair

Continuing the belated Spring 2013 Fiber Arts Degree posts:

Once upon a time I had very long dark brown curly (aka "naturally tangled") hair. When unsprung, it stretched well past my waist. The best way to keep it from attacking innocent bystanders was to braid or "plait" it.

When I heard "Plaiting" as the next project in the Mixed Media class, I thought about my unruly hair.
{Which is much shorter now and hasn't attacked anyone in years.}

We've all seen plaited purses and baskets but did we think about making them?
Ok, I kinda did, but that is just an example of why I'm on the Fiber Arts journey....
But I didn't consider plaiting them with Paper.

In the first class about plaiting, we were given some yardage of paper - brown and white. We were to go home and cut the paper into strips and fold it like double-fold bias tape.

I went home, spread the old cardboard cutting mat on the living room floor and started measuring and cutting. {See, I don't just use the cutting mat for Treadmill reading!}

Of course...I had some help making my bias paper plaits. {sigh/grin}
(As always, please click on the picture to enlarge.)
Please note - enlarging will not improve the blurry pictures. The cats are just too fast for camera focus some times. (most times)


The short or mis-cut paper strips littered the floor of the house for a few weeks
{but nooooo, my cats aren't spoiled...}
CooPurr
Gryphon {at rest and not blurry!}
A few days later, I was back to class carrying (and trying not to crush) long strips of paper.

Our instructor had us do some basic plaiting, a la plain weave,

and then we went a bit free form and tried some turns and folds....
 

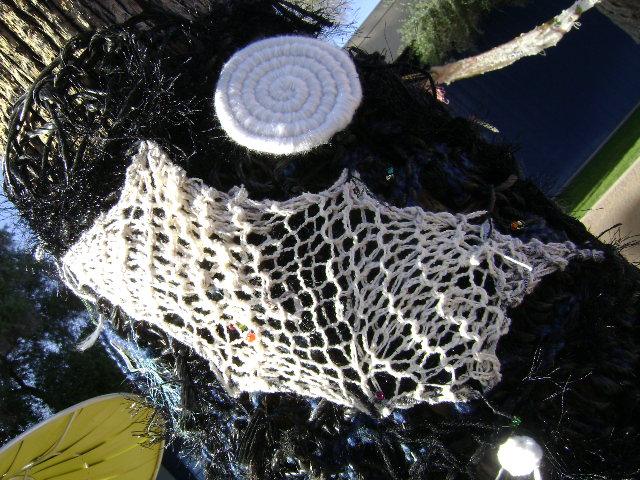
The instructor gave us some patterns to emulate, and after a false start, I got the hang of it and plaited this:
Yep, we use T-Pins to position the strips and keep them from wandering off and we perform the plaiting.

We were then ready to plot our large plaiting projects.
I had a concept to use calendar pages with a spacer and did a little testing of my concept with construction paper and magazine pages:

I liked the effect so I thought I'd try it with a page from an old Laurel Burch calendar:

Kinda cool but...uh...how does this make a Large Plating project?
What would I do with it/make from it?

Stumped, and inspired by a comment from the instructor, I played with the painted Pellon Interfacing from the Surface Design Play day.

And I wasn't particularly thrilled. {Ugh}
Neither was the instructor. She suggested some yarn be added....
{sigh} {Ugh-er}
I didn't feel this would get me a decent grade so I went back to my calendar-paper plaiting plot, stared at pictures on the Internet, and I ended up plaiting two small baskets.
(The Square basket is approx. 3" x 3.25 & 2.75" tall. The round basket has a diameter of 2.5 and is 3" tall)
The paper is from an old cat poster/calendar.
 

Yep, this is the paper from the Laurel Burch plaits I practiced upon earlier; cut even smaller. 

These small baskets didn't seem like much of a "Large" project, but I was out of time and presented them at the next class.
And I believe the instructor was rather impressed.
These two small baskets got me the "A" in my plaiting large project!
The view of the bottom of the baskets.


There's the numbers from calendar page - and
some of my to-do scribbles. 
You are correct, there is no glue used in this,
just a lot of tucking.
I am most fond of this wee Laurel Burch-ish basket. 


Apparently sometimes the small things can equal a viable large project.
And yes, I would like to try plating with other materials.

Tom Knisely Presentation

By the way, at the beginning of our plaiting sojourn, our instructor allowed me to skip a class {Thank you!} so I could attend the Tucson Handweaver's and Spinner's Guild meeting where Tom Knisely spoke about Loom Maintenance.
Mr. Knisely is an instructor at The Mannings Handweaving School in Pennsylvania {yes it is a wishful dream of mine to attend The Mannings}. He is also known for some books and especially two videos: "The Loom Owner's Companion" and "Weave a Good Rug".
It was a very informative and engaging presentation and I found him to be a charming, fun, and very knowledgeable speaker. He complimented our guild on it's organization, communication, outreach and our many Study Groups. {Woot!}

He started from the back of the loom and worked forward discussing the applicable loom maintenance. He suggested Silicon Spray as a lubricant for the metal parts and he likes Whatco Danish Oil (which appears to be available locally at Lowes & Home Depot) but he also commented that Howard's Feed-n-Wax "smells wonderful". He also suggested we give our loom a birthday and give it a thorough cleaning on that date.  I took pages and pages of notes that I will not repeat here. {Bet you're a little glad I won't type it all in here...}

Many questions were asked about a wide variety of looms and he appeared to be intimately familiar with each loom. Pretty spiffy! I didn't take the workshop he taught that week - partially because of the financial diet and mostly because {grin} I'm pretty sure I'm currently too weaving ignorant to attempt it.

My weaving class in the Fall semester is progressing. We've been learning how to setup the warp and put it on the loom. There is so much to learn.
This warp is actually Royal Purple. I have
no idea why it looks blue in this picture. 

Sunday, August 25, 2013

Surface Design Play Day, Fiber-esque Videos & The Corn Mothers

Continuing the belated Spring 2013 Fiber Arts Degree posts:

Surface Design Play Day:
We had a "play" day in Mixed media where we explored a little bit of Surface Design on a yard of Pellon Interfacing (non-fusible). ;-)

Fabric paints were made available to us and the colors and patterns created by the class were varied and amazing. {Yep, I'm a ninny - I didn't get pictures. Sorry.}
{Thanks are offered again to my table & lunch mate who brought in and allowed me to use her extensive collection of paints!}

However, here's the one I painted.

I folded it accordion-style and painted some parts, soaked other parts and got a surprise bit of red from one of the clothes pins I used to keep it folded. {grin}

Oh - and it was suggested we could use our painted pellon in our Plaiting project - which I did (although I wasn't particularly tickled with the results).
What is plaiting? That's one of the up-n-coming blog posts. ;-)

Mikale seemed to liked my Surface Design efforts:


Educational Fiber-esque Videos:
Well, I thought I'd be able to offer links to some of the stellar, art/inspirational videos the teacher showed us but I can't even find references to most of them online or on Netflix. {sigh} I would guess they are available in the Pima College...well, two of them are:

"Textile Magicians Japan" The video liner description sums it up very nicely: "An exceptional and poetic voyage through the worlds of five contemporary Japanese textile artists living and working in harmony with nature in the cedar forests north of Kyoto". Their art seemed well-considered and their creative actions had a calm, reflective quality. The resulting works were inspiring but and sometimes surprising.


This adventurous blogger travelled to Kyoto and met several of the artists featured in the film!

"Blue Alchemy" by Mary Lance was a fascinating film about the various ways that people extract indigo and how the dye is used. I want to see it again!  Here's the trailer for the film.


The Return of the Corn Mother Exhibit:
The Corn Mother Exhibit was in one of the Pima College Galleries during the Spring Semester as Pima College Board Member Dr. Sylvia Lee and her mother Sofia were named 2013 Corn Mothers.

The Corn Mother Website describes today's Corn Mothers as: "women who live, study, and work in the Southwest: Arizona, Colorado, New Mexico, and northern Texas. Some are native, indigenous to this region. Others have journeyed here, as thousands have done for centuries, from other places. They all share an ability to pull from the past all that is sacred and holy, and to create a future that is filled with promise."

Our class went to explore this inspiring multi-generational/cultural exhibit and our instructor asked us to write a short paper answering 3 questions as though we were going to be named a Corn Mother:

1. Why you are a Corn Mother?
I believe my current educational endeavors, pursuing a Fiber Arts Degree, could be viewed as a culmination of my journey as a Corn Mother. I was born in the Southwest, here in Tucson. My parents set an excellent example of love, honor, ongoing education, thrift, humor, the basics of religion, and applied equality. These became core fibers in my life. As I have grown and continued to learn those fibers are strengthened and joined by heartful experience: love, discovery, extreme work ethic, illness, care-taking, loss, spirituality, memories, friendship, disappointment, hope, and laughter. It is hard to describe or quantify this journey. However I can say there is much to learn, my current path is feeding my soul, and I laugh much more often in this part of my journey.

2. Life Quote:
I have two favored quotes that remind me to have fun, retain hope, and keep an open mind:
"Wrinkles should merely indicate where smiles have been." Mark Twain
"The freethinking of one age is the common sense of the next." Matthew Arnold


3. Where would you be Photographed?
There are many locations around Tucson at which I would choose to be photographed. I considered that I might like to be photographed at Pima College - the site of my current educational explorations.
I also considered a photograph at the Arizona-Sonora Desert Museum amongst the charming and fierce little birds in the Hummingbird exhibit.
However, I would probably choose to be photographed at sunset, sitting on the hood of my truck in the pull out on the West side of the Tucson Mountains, just down the hill from Gates Pass. It is a place I have visited many times throughout my life. I find it soothes my mind, inspires appreciation of our lovely desert/sky, and it reminds me to slow down and mind Life and the road as I sit and watch people drive through Gates Pass.


Here's a video someone made going down the backside of Gates Pass in the Tucson mountains - the pullout I describe is at the 1 minute mark in the video (on the left side of the road). 

Lastly, it's not the view from Gates Pass, but here are a couple of Arizona Sunsets from the middle of Tucson {Ha - as if the telephone poles/lines weren't a not-Gates Pass giveaway!}:   


Tuesday, August 20, 2013

Mixed Media Knotting (aka Macrame)

Continuing the belated Spring 2013 Fiber Arts Degree posts:
The next "media" we covered in the Mixed Media class was "Knotting".
Also Known As: Macrame.

I don't actually remember my Mom doing Macrame. I do remember we had a bunch of Macrame plant-hangers-n-such 'round the house. And I remember when they got old they shed and eventually dropped the plant. {wry grin}

I'm embarrassed to say I was a bit leery when I realized the "Knotting" we were learning was that 70's-throwback craft: Macrame.

And - I really enjoyed it!

We practiced with random yarn the teacher pulled out for us...it took a while for the idea of which strand to cross over which way when going each direction to stick in my brain.
But I kind of liked how it worked.

The instructor then let us go though the mondo cabinets of yarn to pull colors for a small knotting project to practice upon. I found a novelty strand with navy blue, brown, and tufts of navy yarn stranded together and it became the inspiration for the other yarns I pulled - more brown, red, blues, and even MORE red. And I decided I realllly liked how it worked and how it knotted up.
{Can't miss the tufts coming off the "inspiration" yarn.}
The back of my brain reminded me that somewhere in the multitude of crafts-to-do awaiting my attention was a macrame kit of some sort. I tracked it down and tried the nifty Half Knot Twist stitch suggested for this bracelet:
The fiber was a bit slubby but the twisted stitch caught my fancy. 
As part of our assignment, we were told to add in, and subtract off some strands. So I decided to add in strands and incorporate the stitch I'd gotten from the kit into my small knotting practice piece:


The instructor correctly pointed out that the twist traveling across the front of the piece hid the color shift that was really pretty spiffy. So - I removed the twist and wove the stay ends in across the back.


I finished the small knotting project after I'd started the large knotting project. I believe I'd discussed the large knotting project with the instructor and we'd plotted a second, larger color-gradation companion piece to the small knotted project. So I guess both pieces became my large knotting project.
{I keep thinking there should be a third piece to round out the project but I'm not sure what color...}

Once again, we visited the mondo cabinets of yarn and once again I was inspired by one yarn for the entire project. It's hard to see in the picture below, but it's the slender, muted turquoise just off-center on the right. It was mis-placed in the wrong part of the cabinet and stood out. And it reminded me of water - the ocean. I then started seeking out more colors in that family and then I travelled to other shades and built another gradation of color.

The project didn't travel particularly well - pinned to the board as it was. And it had to be hidden away from Los Gatos. But I worked on it steadily and took the "Ocean" theme a little further, adding my nifty Half Knot Twist stitch to represent the waves rolling in.
 When I had it mostly knotted, the question of what to do with the ends arose. I played with it a while, considered clipping off the ends or weaving them in but I eventually decided...to leave them be.
Hmmm - looks like I forgot to take a picture focusing on the yarn tails.

 The topic of the tails also came up in class and the instructor presented the class with a variety of options:

  1. Hang vertically so yarn trails down toward the ground
  2. Remove the yarn tails
  3. And the way I had plotted it - horizontal, darkest yarn at the top and tails on the left hand side. 

The vote was that the tails should stay but I found it rather fascinating and nifty that not everyone visualized the ocean and waves the same way I had.
{Ok, some folks didn't get the ocean vibe at all.} ;-)
The interpretation from one of my table mates is my favorite and delights me. She saw it depth-wise. She saw the white as the top of the ocean and the colors (water) darkened as you go "downward" with the ocean depth. Cool, huh?

I'll say it again: I truly enjoyed my limited sojourn into Knotting (Macrame) and I keep thinking about that 3rd companion piece to the two shown above. We'll see if I get back to that.
But I did do a little more knotting - for use in my final Mixed Media project.
I used it in a way that I don't think is usual for Macrame.
{And I'm pretty darn tickled with the results - but that is fodder for another post.}


Tuesday, June 11, 2013

The Finger Crochet Group Project or Teacher-Sanctioned Yarn Bombing

When I last blogged about the Mixed Media Class adventures, I'd just discovered my crochet-without-a-hook skills were, to say the least, disappointing. ;-)

Our next assignment was to create a large-scale Finger Crochet project - as part of a four-person group.
We were charged with creating an Art Installation suspended from one of the palm trees out in the common area of our end of the campus. The Art pieces would stay there for a week. 

We were given leave to use a Crochet hook if we so desired {yay!!} and our project required a theme/plan that would need to be approved by the instructor.

Our initial ideas were not approved. ;-)
More discussion ensued, more ideas were presented to the instructor.
The chosen theme was...: Light Pollution.
My suggestion for a title was adopted: "Obstructed by Light".
The instructor gave us some good ideas on how to represent the effects of Light Pollution on the skies of Tucson and we were off!

So here was our plan: We would crochet two large panels and attach random stars and three sets of constellations to each side. One side would represent the un-polluted night sky where excessive city lights would not dull down or hide the stars. The side that represented the light-polluted night sky would have fewer and less-bright stars.

The majority of the two large crochet panels were accomplished by two others in my group. The un-polluted side of the sky was crocheted by my spiffy already-adept-at-crochet table-mate {and between-classes lunch buddy}.
The light-polluted sky was primarily crocheted by the clever young lady who had suggested the "Light Pollution" theme.

The 4th team-mate and myself worked on choosing constellations, crocheting a lot "stars" {bright or dull as the "pollution" allowed}, and applying the constellations to the light/dark sky panels. I went through my stash, donated some mondo skeins of black yarn to be used in addition to the yarn from the classroom stash and the impressive amount of bailing twine provided by the unpolluted/"dark" side crocheter.
I also pursued creating light/dark moons and I had a minor knit-fit and created a "Milky Way" to attach to the un-polluted side of our installation. {I really wanted to have some knitting included in the crochet installation and it turned out the "Milky Way" was specifically appreciated by several folks!}
 

During the planning stages, we had been concerned that our installation might end up at the bottom of the palm tree like a loose sock. Soooooo not an issue.
We discovered that palm tree "bark" and yarn-y panels work much like Velcro and the panels stayed exactly where we put them.

When installation-day arrived, we crocheted-together and then augmented the panels to have mountains around the base.
OK, I didn't do a lot-a lot - there were already 3 pairs of hands doing the deed and the palm tree was only so wide.

So, I wrote  the description for our art installation - pulling in comments from our previous discussions,  tweaking it after a group review and altering it per the instructor's changes. I believe when it was finally typed/printed some minor changes were made but the teacher also recanted some of her modifications, allowing more of my original phrasing. {Thanks!}

We were generally pleased with our efforts and particularly pleased later when one of the other art instructors {a gentleman that had previously been a curator} shared some very pleasing comments regarding our "ART".

Obstructed by Light: "This work is intended to increase awareness of the impact of light pollution on our desert sky. Tucson has been considered the capitol of astronomy. Although some measures have been taken to reduce light pollution, our city lights hinder our ability to see the stars, constellations, and the Milky Way in our night sky. They are obstructed by light."


These are the installations crafted by the other two groups*: 
{As always, please click on the pictures to enlarge}

Desert Spirit: "The wild desert is a place of continual growth and beauty, as well as death and transition. This work represents the flow of life from the splintering trunk of the old palm to the boughs of the olive tree. We used many colors and textures to embody the subtle spirit of our Sonoran home."


Grow Your Nest - Find Your Home: "This work comments on the nature of living things, and our need for shelter, no matter what kind of animal, big or small. Birds nests in particular are a wondrous feat. With only beaks and claws they are able to weave masterpieces. Our piece is a tribute to these hard workers and the beautifully simple yet infinitely complex homes they make.
This work also symbolizes a person's need to build their nest and create an original life for them selves. We are all looking for a place in this world and everyone has a need to grow their nest and find their home."


By the way - yes I did tell folks we were "Yarn Bombing".
{Deadly Knitshade can explain Yarn Bombing/Storming / Urban/Guerrilla Knitting better than I.}  When I realized June 11th is International Yarn Bombing day, I knew on which day I would publish this post!
Do you feel like running out to decorate something with yarn now?

*Please note: I included the title/description of each installation exactly as written but without the names that appeared at the bottom of the description. I did not include the names of the artists/students that created the above installations because I did not specifically ask if I could publish their names on this blog. Thanks!